The USGS Board on Geographic Names maintains the Geographic Names Information System (GNIS) database. It is a database of over two million points in the United States. This database:
contains information about physical and cultural geographic features in the United States and associated areas, both current and historical (not including roads and highways). The database holds the Federally recognized name of each feature and defines the location of the feature by state, county, USGS topographic map, and geographic coordinates.
You can download the 79 megabyte GNIS zip file from here. You will want to select the NationalFile as it is not broken up into individual states. Importing GNIS into PostGIS is slightly more complicated as it does not come as a Shapefile, but instead as a 293 megabyte text file once it is unzipped from the above. Download the file, unzip it, and open a command window where the unzipped file is. Note that the last time I did this on Windows, using the command line client was an exercise in pain due to how Windows handles code pages and character types. On Windows it might be easier to do this inside something like pgadmin.
To import, first create a database inside PostgreSQL using something like the following:
createdb -T gistemplate USGS
Once done, you will want to run
psql -d USGS
to start the PostgreSQL database client. Now you will want to create the table to hold the data. To do this, copy and paste this statement into the psql client window:
CREATE TABLE gnis
(
 feature_id integer NOT NULL,
 feature_name character varying,
 feature_class character varying,
 state_alpha character(2),
 state_numeric character(2),
 county_name character varying,
 county_numeric character(3),
 primary_lat_dms character varying,
 prim_long_dms character varying,
 prim_lat_dec real,
 prim_long_dec real,
 source_lat_dms character varying,
 source_long_dms character varying,
 source_lat_dec real,
 source_long_dec real,
 elev_in_m integer,
 elev_in_ft integer,
 map_name character varying,
 date_created date,
 date_edited date
);
Note that I COULD have spent the time figuring out the maximum size of each column, instead of just making them varchars, to save space. But, again, I’m lazy 🙂
Now to import, you will run the following command. The .txt files is over two million rows, so it could take a while to import depending on the speed of your system.
USGS=# \copy gnis from NationalFile_20140204.txt DELIMITER '|' CSV HEADER
If you get a file not found error,run \copy with the full path to the NationalFile. Depending on when you do this, the file name may be different based on when it was last updated.
We are not done yet. There is no actual geospatial geometry column in the database. We will need to create one from the existing columns. To do this, first we must create a geometry column to hold the geospatial points.
USGS=# SELECT AddGeometryColumn('public', 'gnis', 'geom', 4326, 'POINT', 2);
This command tells PostgreSQL to add a geometry column named geom to the gnis table in the public schema using NAD83. Now we need to actually populate this column. We need to take the latitude and longitude columns in the table and convert them into a binary representation that PostGIS uses internally.
USGS=# update public.gnis
SET geom = ST_PointFromText('POINT(' || prim_long_dec || ' ' || prim_lat_dec || ')', 4326);
Here we have PostgreSQL convert the prim_long_dec and prim_lat_dec columns into a POINT and then to the actual geometry using the ST_PointFromText function inside PostGIS.
Now we need to add a geospatial index on the geom column. You need an index to use the data in apps such as QGIS as it makes area look-ups much faster.
USGS=# create index gnis_geom_gist_idx on gnis using gist(geom);
Now that we have an index, we need to create our database statistics and cluster it on the geom column. As I mentioned in a previous post, you will run these commands in order (waiting for each one to complete before running the next):
USGS=# vacuum analyze gnis;
USGS=# cluster gnis using gnis_geom_gist_idx;
USGS=# analyze gnis;
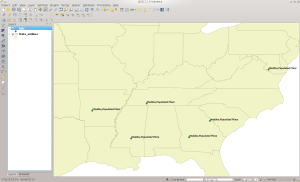
And now we are done. You have your own local copy of GNIS that you can use in visual GIS tools or from the command line. There are some fun things you can do with the data, such as the below figure shows where I used QGIS to load all points in GNIS that have my last name in them (my modesty astounds even me 😉
Happy GISing!

